Using the Story Board Kits with Anna-Maria Wolniak
My idea for this tutorial was to create a layout built on a simple composition but made with various techniques.
I grabbed a few pink, magenta, red and white supplies from October Story Board scrapbook and documenter kits. I prepared a 'Europe' craft die (this is my totally favorite die EVER!), stitching stencil and stamps from the kits.
In my first step I created layers under the photo using a recycled vellum bag, pieces of patterned papers, and journal cards. I also added an old tag (recycled label) with white twine. I chose this amazingly bold, magenta paper as a background for my page (yep, it wasn't easy). When all the layers were stuck together I checked which elements would suit to the composition.
I haven't used my Big Short for ages! It was a perfect occasion to dust off this beauty. I was looking for the perfect paper to cut this Europe map. It couldn't be pink or red and plain white didn't look good either. I finally used a journal card with pink sentence.
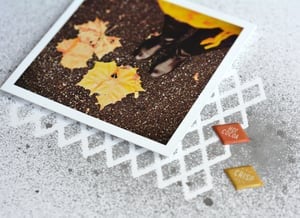
I glued all cut elements to the photo (distinguishing the two countries, Poland and UK, using dimensional foams). At first sight I knew that some white splashes (made by Mister Huey's Opaque White mist) would make this layout more consistent.
I looked at the page from a distance and decided to distinguish both countries even more than only lifting them. I took a set of watercolors and painted these pop up elements using yellow cyan shade (yellow with a drop of orange). This color highlights important elements from the map perfectly and it gave a dimension that they needed.
I also rejected the pink rubber heart. The layout looked too bland so I swapped this embellishment with another rubber heart, but this time I chose the red one. Next I pasted sentences printed on the thin stripes.
I made up my mind and finally decided to embroider the title (fancy technique which is rare). I used my old Amy Tangerine's set with alpha stencils.
I put together two shades of threads: yellow and silky orange to make the stitching.
Then I stamped grid lines with a stamp from the Story Board scrapbook main kit and black ink - three raws in two columns.
I found an interesting way to affix those black, fancy number clips not using any extra piece of paper. I just cut two tiny lines using a craft knife...
...and slipped clips inside. The inner part is invisible and the layout is flat.
At the end of my creative work I wrote journaling using a white crayon. Now check out the final project and see the close-ups.
I made a simple composition and used 6 different techniques: layering, die cutting, splashing, watercoloring, stitching and stamping - pretty awesome in my opinion. Hope you felt inspired at least by one of them to create your own project. See you next time.
xoxo Anna-Maria

Supplies: "Story Board" Documenter Kit, "Story Board" Scrapbook Kit, Koi Watercolor Paint set, Europe Stamp and Craft Die Set


Love this! I'm getting a white pencil ASAP - I haven't had much luck with any white pens.
You should! :)
Sign in or sign up to comment.
This is totally adorable. Great idea to cut slots for the clips, I am totally going to do this! And I loved the embroidery and the grid journaling. I have those Amy Tangerine embroidery templates, they are time consuming but really so fun! Thanks for sharing :)
Thank you so much!
Sign in or sign up to comment.
Love this so much and I need a white pencil now too!
Thanks Rhonda! This Darwent white pencil is really nice and soft. I used it only because my uni-ball pen was finished till I wrote the first word on this layout.
Sign in or sign up to comment.
@aniamaria you have really been inspiring me on the blog lately. All of your layouts have been stunning!!
Thank you so much for your kind words. Xoxo
Sign in or sign up to comment.
Oh wow, this is just beautiful! I love the creativity displayed and the central focus on the photo!
Sign in or sign up to comment.
Love your layout and all your color choices and techniques, the white really pops off the pink! You are truly blessed to have such a great friend like that!
Sign in or sign up to comment.
Your layouts are always the best, thanks for the tutorial!
Sign in or sign up to comment.
Love how you cut the slots for the paper clips! So clever.
Sign in or sign up to comment.
I am always inspired by your work. Love the colors (bright magenta and yellow) and appreciated the step by step instructions. I would have never thought about the paperclip idea so this makes me much more excited about using them. Thanks for sharing!
Sign in or sign up to comment.