day by day | Darling Dear
The last week of the year was such a short week. Only two days. So, instead of combining those two days with the prior week I decided to give them their own page. This eliminated the need for me to create an end page for my 2012 album.
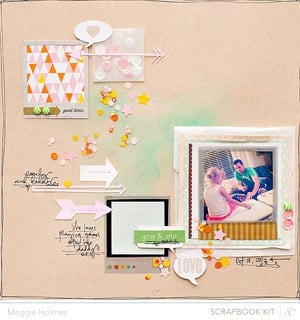
I dug into my Darling Dear products and printed my photos. The oranges and blues in the collection worked really well with my photos from those two days. I added a receipt from our New Year's Eve pizza night and a music book page with "Auld Lang Syne" on it. Totally lucky that I came across that in my scrap basket.
To
hold the new business card my husband had printed I cut a 3x4 piece of
patterned paper and also a smaller piece. I punched a half circle in
the middle and stitched them together, leaving the top open. A quick
and easy pocket. Just make sure to do any embellishing that goes
through the back of the paper (ie. sewing, brads) before you sew your
pocket closed.
I
didn't do a lot of embellishing on this spread other than adding labels
and a tiny embellishment here and there. There wasn't a lot of room.
I wanted to do something subtle so my photo would still stand out so I
punched snowflakes out of vellum and stitched them down over the photo.
I added some of the gems for a little sparkle.
I really love the Darling Dear journaling cards and pushed my hoarding tendencies aside so I could use this one with my photo of my daughter on the sled.
And with that my 2012 Project Life album is complete. It's a good feeling and I'm excited to be moving on to 2013.
(Supplies: patterned paper - Flynn, Gable (Darling Dear); journaling cards; chipboard speech bubbles; gems - brights, whites, grays; vellum; date stamp - Classic Calico V.3; tiny attacher; ink - versafine; labels)


Sign in or sign up to comment.
0 comments